>>
30-MINUTE MEALS! Get the email series now →


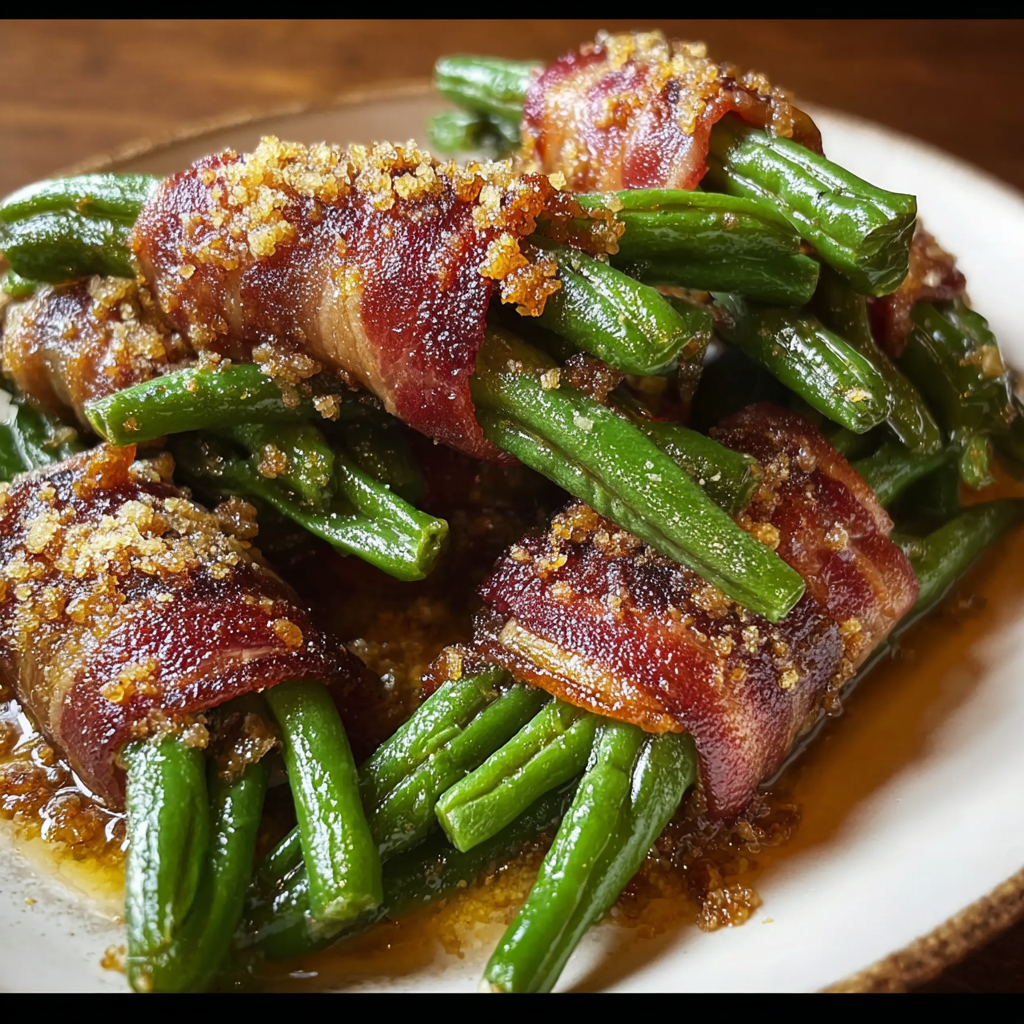
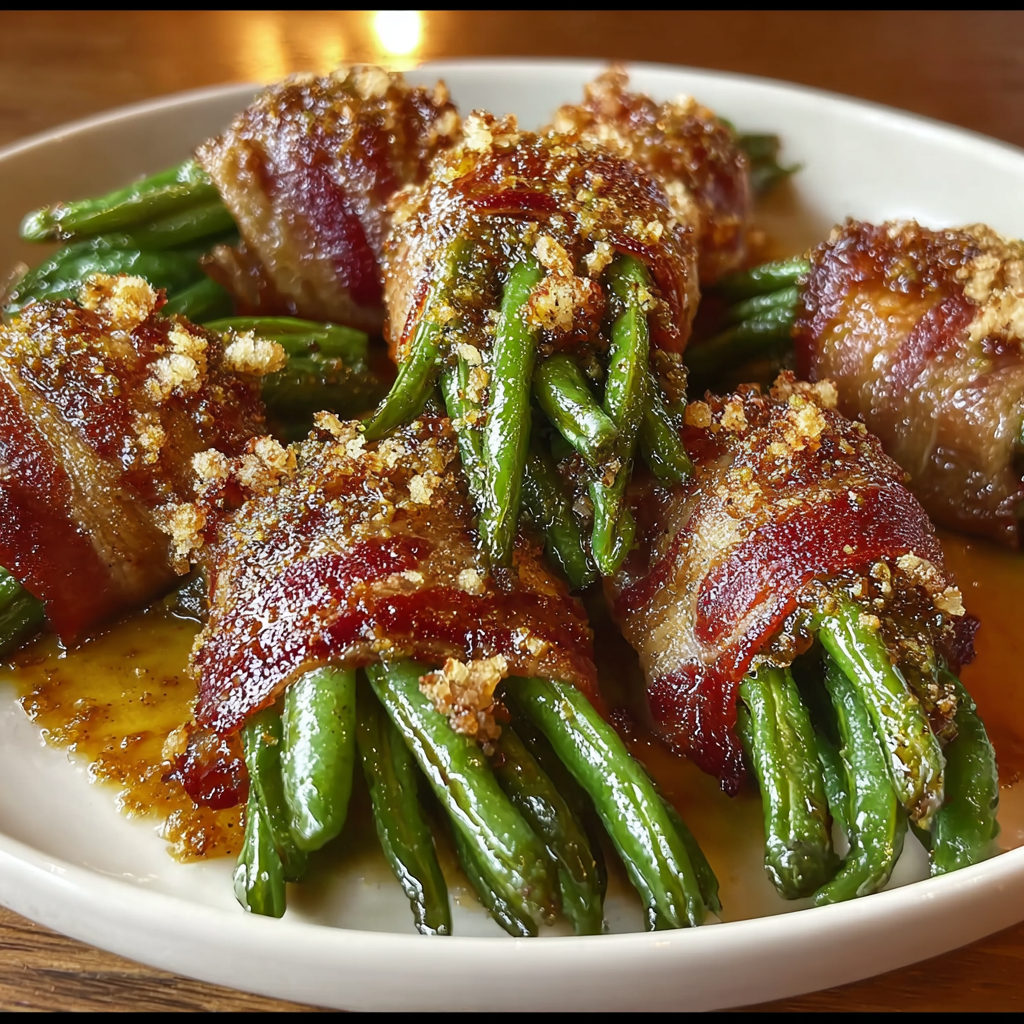
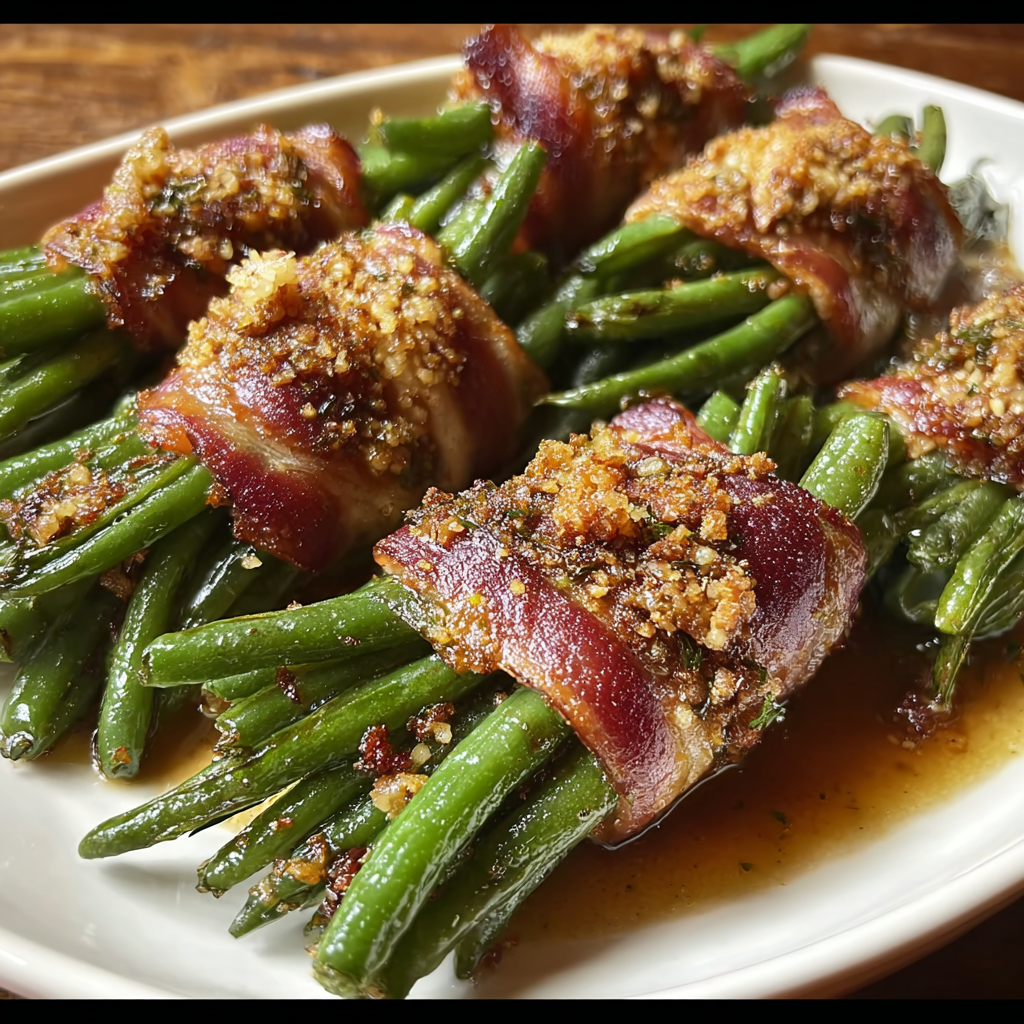
Bacon-wrapped green beans glazed in sweet brown sugar for an elegant, holiday-ready side dish that's crispy, tender, and crowd-pleasing.
This recipe for bacon-wrapped green beans has been my go-to side dish for holiday tables and special dinners for years. I first put this combination together one Thanksgiving when I wanted something elegant that could sit on the buffet and still look as good as it tasted. The contrast of bright, tender-crisp beans with smoky, crispy bacon finished with a sticky, slightly sweet brown sugar glaze made it an immediate favorite in our house. Friends who typically shy away from green vegetables keep coming back for these bundles, and they often vanish before the main course is finished.
I discovered the balance that makes this dish sing after a few trials: a short blanch to set the vivid color and ensure tender-crisp texture, thin bacon for quick crisping, and a butter-and-brown-sugar glaze that caramelizes without burning. The result is savory and sweet, with the garlic seasoning adding an undercurrent of warmth. I like to make these for seasonal gatherings because they can be assembled ahead and roasted just before guests arrive. Fred Johnson's version—simple, elegant, and reliably delicious—has become a permanent feature on our holiday rotation.
When I first served these to my extended family, the kids were convinced it was a special treat and the adults appreciated the restrained sweetness. The combination of smoky bacon and glossy glaze always prompts the same reaction: an immediate request for the recipe and for seconds. Over the years I refined the blanch time and the bacon width to hit the perfect balance every time.
My favorite aspect is the visual payoff—twelve neat bundles that look like they came from a fancy kitchen but are really simple to make. At a recent family gathering I was asked to bring two pans; both were empty by the time dinner started. The crunchy edges, glossy glaze, and bright beans combine into little bites that feel festive and homey at once.
To store leftovers, cool the bundles to room temperature within two hours and transfer to an airtight container. Refrigerate for up to three days. For longer storage, freeze unglazed bundles on a baking sheet until solid, then transfer to a freezer-safe bag for up to three months; label with date. Reheat refrigerated bundles in a 375°F oven for 8 to 12 minutes to regain crispness; for frozen bundles, roast at 400°F for 20 to 25 minutes, brushing on glaze in the last 8 minutes so it caramelizes without burning. Avoid microwaving if you want to preserve bacon texture.
If you need gluten-free, swap regular soy sauce for tamari or a labeled gluten-free soy sauce in equal measure. For dairy-free, replace melted butter with melted coconut oil or neutral oil; you will lose a bit of richness but keep the glaze sticky and flavorful. If you prefer less sweetness, reduce brown sugar to 1 tablespoon and add a teaspoon of Dijon mustard to balance acidity. For vegetarian guests, skip bacon and roast bundled green beans with slices of smoked tempeh or thinly sliced halloumi, brushing with the same glaze after roasting to add savory-sweet contrast.
These bundles pair beautifully with roasted turkey, honey-glazed ham, or a simple roasted chicken. Present them on a warmed platter and garnish with a few lemon zest curls or finely chopped toasted almonds for texture. They also work as a finger-food appetizer on a holiday buffet—serve alongside a small bowl of tangy mustard or apple cider vinegar reduction for dipping. For a seasonal twist, add pomegranate seeds on the platter just before serving to introduce color and a bright pop of acidity.
Bacon-wrapped vegetables have long been a part of American holiday and Southern cooking traditions, where cured pork is used to add richness and smoky flavor. The practice likely emerged from wanting to dress up simple vegetables with a little indulgence for special occasions. Pairing green beans with bacon and a touch of sugar echoes the classic American holiday approach of balancing savory, sweet, and textural contrasts on the table.
In winter, swap green beans for thin asparagus spears when they are at their peak and reduce blanch time to 1 to 2 minutes. For summer cookouts, grill the bundles over indirect heat rather than roasting—monitor closely to prevent flare-ups from bacon fat. During fall and winter holidays, add a sprinkle of ground allspice or a pinch of cayenne to the glaze for warmth and depth.
For make-ahead ease, blanch the beans and cool them well, then assemble the bundles and store them uncovered in the refrigerator for up to 24 hours; the bacon may adhere slightly to the beans, but they roast beautifully. If you want to prep further ahead, assemble unglazed bundles and freeze as noted above. Keep glaze in a small airtight container and brush just before roasting so sugar doesn’t dissolve and water-log the bacon. Pack cooked bundles in single-layer meal prep containers with paper liners to maintain texture for up to three days.
These bacon-wrapped green bean bundles are the kind of side that makes a meal feel thoughtfully composed without demanding hours of preparation. Whether you are dressing a holiday table or elevating a weeknight dinner, they deliver color, texture, and flavor in one compact bite. I hope they become as much a favorite at your table as they have at mine.
Pat beans very dry after blanching so the glaze adheres instead of sliding off.
Use thin-cut bacon for faster crisping; thick-cut may need additional oven time.
Place bundles on a wire rack over a rimmed sheet to allow air circulation and crisp bacon evenly.
Brush glaze again in the final 8 minutes of roasting for deep caramelization without burning.
If using toothpicks to secure bacon, remove before serving to avoid accidental bites.
This nourishing green bean bundles recipe is sure to be a staple in your kitchen. Enjoy every moist, high protein slice — it is perfect for breakfast or as a wholesome snack any time.
Blanching stops the cooking process, keeps the beans bright, and ensures they finish tender-crisp in the oven.
Yes. Prepare bundles ahead and refrigerate up to 24 hours; roast just before serving. For longer storage freeze unglazed bundles and roast from frozen.
This Green Bean Bundles recipe makes perfectly juicy, tender, and flavorful steak every time! Serve with potatoes and a side salad for an unforgettable dinner in under 30 minutes.
Preheat oven to 400°F and prepare a rimmed baking sheet with foil or a wire rack. Arrange an ice bath and a pot of salted boiling water for blanching.
Boil trimmed beans for 5 to 6 minutes until bright and slightly tender, then immediately plunge into ice water to stop cooking. Drain and pat dry.
Whisk melted butter, brown sugar, garlic seasoning, and soy sauce until a thick, spreadable glaze forms. Adjust sweetness or salt as needed.
Gather 5-7 beans per bundle and wrap each with a half slice of bacon, tucking ends under or securing with a toothpick if necessary.
Place bundles on the baking sheet seam-side down, sprinkle with extra garlic seasoning, and brush each generously with the glaze.
Roast for 30 to 35 minutes, turning halfway through, until bacon is golden and crisp and glaze has caramelized. Watch closely near the end to prevent burning.
Let rest 2-3 minutes so the glaze sets slightly, then transfer to a serving platter and serve warm. Remove toothpicks before serving if used.
Last Step: Please leave a rating and comment letting us know how you liked this recipe! This helps our business to thrive and continue providing free, high-quality recipes for you.
Leave a comment & rating below or tag
@royalrecipe on social media!
Bacon-wrapped green beans glazed in sweet brown sugar for an elegant, holiday-ready side dish that's crispy, tender, and crowd-pleasing.

Portable breakfast roll ups filled with creamy scrambled eggs, savory sausage links, and melted cheddar wrapped in buttery crescent dough for an easy grab and go morning.
Crispy chicken and tender broccoli coated in a sweet and savory honey sesame glaze—ready in 30 minutes for a weeknight favorite.
Leave a comment & rating below or tag @royalrecipe on social media!
Enjoyed this recipe? Share it with friends and family, and don't forget to leave a review!
This recipe looks amazing! Can't wait to try it.
Comments are stored locally in your browser. Server comments are displayed alongside your local comments.

Join to receive our email series which contains a round-up of some of our quick and easy family favorite recipes.